
Keeping fish in an apartment requires more than picking colorful gravel and compatible tank mates; it demands an engineering-minded risk analysis that balances water weight, floor structure, electrical capacity, and the lease terms that govern liability. This article reframes aquarium ownership for renters as a systems problem: quantify loads, reduce failure modes, disclose proactively to landlords, and choose a tank size that matches your building’s constraints and your insurance coverage.
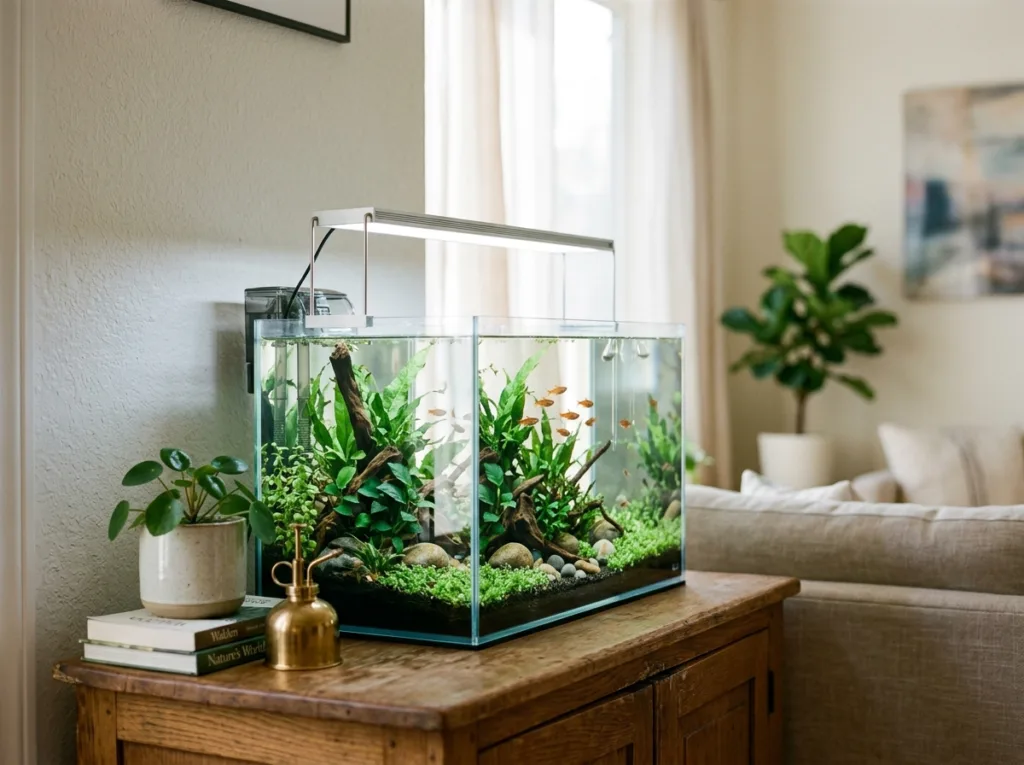
Thesis: Treat an Aquarium as a Small Structural and Utility Installation
An aquarium in an apartment is a concentrated load, an electrical device cluster, and a potential source of water damage. Approaching it as an ad-hoc installation creates unnecessary risk. Start by asking three engineering-style questions: (1) How much load will the filled tank place on the floor where it will sit? (2) What are the primary failure modes (seal leaks, overflows, stand collapse, piping failures) and how can you mitigate them? (3) Does your lease and insurance relationship accept that residual risk once mitigations are in place? If you answer those sequentially, you get a defensible plan rather than wishful thinking.
Water Weight — the Core Calculation
Water drives the numbers. A useful, conservative conversion is 1 gallon of water ≈ 8.34 pounds (3.78 kg). That gives a first-order calculation of the load you are introducing:
- Water weight = tank volume (gallons) × 8.34 lb/gal
- Estimated total loaded weight = water weight + tank glass/acrylic + stand + substrate + equipment
Glass or acrylic tanks and the cabinet/stand typically add between 10% and 30% to the water-only weight, depending on tank construction and how heavily the tank is decorated. For planning, use the water-only calculation as the baseline and then apply a conservative multiplier (for example, 1.15–1.30) to approximate the fully loaded system unless you have manufacturer specifications for the tank and stand.
How Floors and Load Distribution Matter
Floors are designed with distributed and concentrated loads in mind. A sofa spreads weight across many square feet; an aquarium concentrates weight on the stand footprint, often through four legs or a cabinet base. Key structural factors to consider:
- Floor type: concrete slab floors (typical of many ground floors and newer buildings) are generally more tolerant of heavy point loads than older wood-framed upper floors.
- Location relative to joists and load-bearing walls: placing a heavy tank against a load-bearing wall and perpendicular to floor joists improves load transfer; placing it in the center of a floor bay increases the bending moment on joists.
- Stand footprint and load path: a wide, continuous cabinet or a stand with a full base distributes load better than narrow legs. Placing a plywood or composite underlayment beneath the stand can further distribute loads to adjacent joists.
When in doubt, ask the landlord or building manager whether the proposed unit has special load restrictions, or consult a qualified structural engineer for anything larger than a mid-size tank. The resource linked below provides typical load categories you can use for initial assessment.


Capacity Matrix: Tank Size, Water Weight, and Practical Risk
| Tank Size (gal) | Water Weight (lb) | Estimated Total Loaded Weight (lb) | Typical Stand Footprint (sq ft) | Practical Placement | Risk Summary |
|---|---|---|---|---|---|
| 5–20 | 42–167 | 55–220 | 1–2 | Upper or ground floor; low structural scrutiny | Low — manageable leaks, low concentrated load |
| 29–55 | 242–459 | 300–550 | 2–3 | Prefer ground floor or against load-bearing wall on upper floors | Moderate — requires landlord notice and insurance check |
| 75–125 | 626–1,043 | 700–1,300+ | 3–6 | Prefer ground floor slab; upper floors require explicit structural approval | High — significant water-damage potential and utility demands |
Notes: water weights are calculated using 8.34 lb/gal; total loaded weight is a conservative estimate and will vary by tank material, stand construction, substrate depth, and equipment. Use these figures as planning benchmarks, not as definitive structural allowances. For technical context on floor load categories, see an engineering reference such as Engineering Toolbox: Floor Loads.
Electrical Capacity and Equipment Reliability
Aquarium equipment—filters, heaters, lights, pumps—draw continuous power. Three practical electrical checks before you fill the tank:
- Confirm outlet proximity and circuit capacity. If multiple aquarium devices share a single small circuit already loaded with other appliances, you may trip a breaker regularly. Avoid multi-tap power strips that combine high-current devices without surge protection.
- Prefer GFCI-protected outlets for all equipment near water. GFCI reduces shock risk in the event of a short through water on the floor or equipment housing.
- Use rated, outdoor-grade power strips or aquarium-specific controllers with built-in surge protection and timers for lighting to minimize equipment stress and provide scheduled off periods for lights.
Electrical safety organizations recommend avoiding ad-hoc extension runs for multi-device aquaria; consider hiring a licensed electrician to add a dedicated circuit if you plan a large tank or multiple high-draw devices. For general electrical safety guidance, see the National Fire Protection Association’s public resources on electrical safety: NFPA: Electrical Safety.
Failure Modes and Mitigation — an Engineering Checklist
Think in terms of single-point failures and how to either eliminate them or reduce their consequence. Key mitigations:
- Secondary containment: place a waterproof tray or pan under the stand to catch small leaks and overflow. For larger tanks, consider a custom sump or drain arrangement if the building plumbing allows.
- Leak detection: install a sensor or alarm at the base of the stand that alerts you (phone or audible) if water escapes. Low-cost wireless sensors are widely available and can be tied into smart-home alerts.
- Stand reinforcement: use a continuous cabinet or a broad plywood distribution board under legs to reduce point loading on subfloor panels and joists.
- Redundant equipment: dual powerheads or parallel filtration paths mean that a single equipment failure is less likely to catastrophically drop water quality.
- Overflow prevention: choose a filtered return and overflow plumbing design that minimizes the chance of siphon-induced overflows during power cycles.
Lease, Disclosure, and Documentation Strategy
From a risk-management perspective, full disclosure and documentation are the simplest way to reduce lease friction and potential claims. Practical steps:
- Read the lease for any aquarium-specific language and restrictions. If you find a size cap, that becomes your immediate upper limit unless you negotiate an addendum.
- Present the landlord with a concise packet: tank specs (gallons), stand type and footprint, planned location (with photos), insurance proof, and planned mitigation measures (secondary containment, leak sensors).
- Offer a signed aquarium addendum if the landlord requests one. Documenting responsibilities for leak damage and repair timelines clarifies expectations for both parties.
- Use a rental-presentation tool: a pet or aquarium “resume” can be helpful. See tips for compiling rental documentation in our Pet Resume & Rental Application Guide.
If you are still apartment hunting and want to avoid later complications, ask building-specific questions up front—our pet-friendly apartment hunting checklist and amenities guide identify the operational details (sump access, utility sinks, laundry proximity) that materially affect how easy it will be to maintain a tank in your unit.
Maintenance Realities and Time Budget
Maintenance is where engineering planning meets human behavior. A perfectly sized tank will fail if maintenance is neglected. Consider these realistic commitments:
- Weekly tasks: partial water changes, glass cleaning, equipment checks, top-offs for evaporation.
- Monthly tasks: deep substrate siphoning, filter media inspection or replacement, calibration of heaters and controllers.
- Annual tasks: lighting replacement, full inspection of seams, re-silicone if small gaps appear, professional evaluation if you detect structural movement or persistent leaks.
If you do not have a utility sink in the apartment, hauling and storing water becomes a time and logistics problem—factor that into your decision. If you’re moving into a new unit, consult our moving day checklist for renters with pets to plan how to transport and set up a tank safely.
Insurance — Don’t Assume You’re Covered
Renters insurance policies vary in how they treat aquarium-related damage. Some policies cover sudden accidental water discharge; others exclude losses from slow leaks or lack specific endorsements for aquaria. Before filling a tank, call your insurer and ask explicitly how aquarium water damage is handled, whether a rider is required, and what deductibles would apply. Keep a copy of any written policy confirmation with your landlord packet.
Decision Aid: A Simple Flow
- Lease cap? If yes, choose a tank within that cap or negotiate an addendum in writing.
- Floor type? If ground-slab, mid-size tanks are more feasible; if upper wood-framed, default conservative volume (20–29 gallons) unless landlord/engineer confirms higher capacity.
- Insurance confirmation? If no, secure coverage or reduce tank size until coverage is obtained.
- Has mitigation been planned (tray, sensor, stand distribution)? If no, implement mitigations before filling.
- Can you commit to the time budget? If no, choose a lower-maintenance configuration or smaller volume.
Practical Examples
Example A: Studio on 3rd floor, lease silent on aquaria. Risk-averse path: 10–20 gallon tank, continuous cabinet base, leak sensor, GFCI outlet, written notice to landlord. Example B: Ground-floor condo with concrete slab and landlord approval. Risk-tolerant path: 55–75 gallon tank with full cabinet stand, dedicated circuit or verified outlet capacity, documented insurance rider, and secondary containment under the stand. In every case, get the approval in writing and document the equipment specs you rely on.
When to Consult a Professional
Consult a structural engineer when you plan a large tank (roughly above 75 gallons), if you detect sagging or deflection in floor panels near the planned location, or if your landlord requests formal confirmation of capacity. Consult a licensed electrician if you plan to add a dedicated circuit or if your current circuits are shared with heavy-load appliances.
Summary: Match Tank Ambition to Building Reality
The clean thesis is simple: aquarium ownership in a rental is a controlled-risk engineering problem. Quantify the load (use 8.34 lb/gal as your baseline), estimate the fully loaded system weight conservatively, check floor type and circuit capacity, disclose and document with the landlord, and install multiple mitigations to reduce the likelihood and consequence of leaks. The right setup is the one that fits your unit, your lease, and your willingness to maintain both the system and the paperwork.
Frequently Asked Questions
Can a landlord legally ban aquariums?
Lease provisions vary widely; some leases explicitly limit aquarium size or require written approval. Whether a landlord can ban them depends on the lease you signed and local landlord-tenant law. For risk control, treat the lease as your contractual boundary and negotiate an addendum if needed.
How do I prove to my landlord that my tank won’t damage the building?
Provide a concise packet: tank specs, stand footprint photos, planned placement against a load-bearing wall (if applicable), insurance documentation, and the mitigation measures you will install (tray, leak sensor). Offering a signed aquarium addendum that clarifies responsibilities is often the most practical route.
What immediate steps reduce the worst-case damage from a tank failure?
Install secondary containment (a waterproof tray or pan), a leak detector with alerts, distribute loads with a wide base or plywood underlayment, and keep a documented insurance rider. Quick-response planning—knowing where shutoffs and towels are and having a container to capture water—also reduces damage in the first minutes of a failure.

Alex is the content editor at PetzNews, covering pet care guidance and pet-friendly housing topics for renters and property owners across the United States